google.com, pub-1695019095451303, DIRECT, f08c47fec0942fa0 Heart & Thrift: cooking
Showing posts with label cooking. Show all posts

Poppin'

Nom nom I sure love kettle corn! Trouble is I don't live at a carnival. You can whip this up quick and easy.
Get a big cauldron and a lid.
1/4 cup of vegetable oil (I used about 2 tablespoons)
1/4 cup of sugar
1/2 cup popcorn kernels

Heat the oil, once it is hot hot put in your sugar and kernels so they can pop pop !

Shake the pan pretty much the whole time so that the sugar doesn't burn.  Be very mindful once the kernels are popping less than 2-3 seconds apart, remove from heat immediately.   I personally LOVE burned popcorn and burnt sugar... but this is not the place for it!  It tastes incredibly bitter and gross if it burns even a little bit.

Will you try this recipe and possibly make a snow cone ?

Hominy Hominy Hominy


Every drop of this soup was beyond amazing !! So what do you do when your freezer is full and you are worried that your steak is getting that delicious freezer burn taste? Turn it into soup!
If you cook meat in a crock pot it makes it nice and soft, and absorbs all the delicious flavors you add to your broth.  I was inspired by the flavors of menudo, but since I am not into cow stomach I substituted beef.  

Recipe:
meat from freezer or stew beef, 1 8oz can of tomato sauce, 5 cups beef broth, garlic, large onion, navy beans, large can of hominy, dash of cayenne pepper, lemon, salt, pepper

Throw all the ingredients into a pot and let it stew for 3-4 hours.  Seriously the meat is so tender, and the hominy has the perfect texture!  Hominy is really plain on it own so it is important to taste as you go, and don't stop cooking til the hominy has flavor.

HUGE delicious tip.... it's avocado season and WOW!  It really makes this taste extra special.

What is your favorite summer time soup?

A Delicious Strawberry Twist


This desert is so easy to put together for company or yourself. With summer here berries are cheap, cheap, cheap! Get your fill while you can basically!

 Ingredients: sugar / strawberries / angel food cake / lemom / whip cream / dash of salt

Macerate those strawberries using the lemon sugar and dash of salt. I like the salt because it actually makes the whole dessert taste sweeter. I would suggest leaving the berries in the fridge for at least 2 hours before enjoying.  If you know you are having guests, toss in a couple of whole berries when the guests arrive to add a different texture to the dish. Here is the important part; toast your angel food cake. The sugar caramelizes, and then the syrup seeps into certain parts of the cake, but does not make the whole thing mush. Whip cream it up and you done!

I hope that everyone is having a lovely start to their summers.

Chocolate Dipped Marshmallow fun


Sometimes you just start to think "I should destroy the kitchen and fling sprinkles and chocolate over every surface!" It completely worked ... kitchen is covered, but there are tasty treats to enjoy ha.  The original tutorial is >here<  This time around I squashed the graham crackers by hand, it definitely lends to more of a s'more texture when the cookies are chunky.  I would definitely recommend this little treat if you are in a bind for something to bring to a party.  They are quick, easy, cheap, and on a platter they pack some bang appearance wise.


These are the extra large marshmallows.  I used sprinkles, almonds, graham crackers and coconut.  Pretty much any topping would be delicious.  Oh wow! What if you dipped marshmallows in white chocolate and then rolled it in a little cinnamon?  Add to a normal cup of hot chocolate and that would be the best drink ever!

Easy Almond Green Beans


Nom Nom Nom, this is one of my favorite easy side dishes. Can be paired with anything.

Ingredients:
green beans / slivered almonds / garlic / butter / salt / pepper / lemon juice

I always use frozen green beans.  If you serve them right away they keep their pretty green color and there is no need for blanching.

Saute and brown the slivered almonds.  This brings out the nutty flavor.... similar to pumpkin seeds oddly enough.

Set the almonds to the side.  Saute green beans with butter, salt, pepper and garlic.  Right before they are completely cooked add a couple squirts of lemon juice.

Toss the almonds in off the heat.  If you toss them after the nuts stay nice and crunchy!! 

I made a bag of frozen green beans and ended up eating the entire bag... oops! no leftovers for me!

Oh goodness you can pair this with a steak or even goat cheese stuffed chicken.... I am going to drool.

Enjoy! What's your favorite easy side dish?

Yum Enchiladas

There is really not much to this. All you need is some chicken breast, onions, garlic, cheese, tortillas and some enchilada sauce.

In a crock pot let your chicken breast cook all day in a shallow water bath. Add seasoning to the water.  I like to use some chicken bouillon, garlic powder, dehydrated onions, (lots) cumin, and cayenne. Toss it all in the pot since you pour the water out anyways.

When you get home, or anywhere between 4-9 hours you can take your chicken out of the crock pot.  As long as there is water in the pot nothing will be ruined if you leave it in longer than expected.

Set the chicken to the side to cool. While chicken is cooling dice up 1-2 onions and saute with garlic, cumin, salt, pepper, some cayenne and chicken bouillon. While onions are cooking pull your chicken with 2 forks .... just make it nice and shredded. Toss the chicken with the onion spice mixture.

Preheat oven to 350 degrees or somewhere around there. Assemble your enchiladas using plenty of your chicken concoction, add cheese, roll and stuff into a pan. Dump your enchilada sauce over the top add some more cheese and bake away!  I would cook for about 35 minutes.

A couple of things that I love about this simple recipe is the fact that you can let most of it cook all day with no concerns! I actually consider this a pretty healthy meal, since I am so skimpy on cheese in general. Really no oil is even needed... and it still packs a huge flavor explosion!

If you normally cook your enchiladas with corn tortillas please try flour. The chewy flour tortilla is just beyond perfect with the shredded chicken. Sour cream is all you need to make it a perfect meal!

Drool.... I need to reassess dinner now.

Paklava

My mom is Armenian, and paklava is by far our families favorite thing to eat during the holidays.  This is how we make it in our home.

Paklava 
5 cups chopped walnuts
3 tablespoons sugar
1 teaspoon cinnamon
1 pack phyllo dough
4 sticks of salted clarified butter

Simple Syrup
2 cups sugar
2 cups water
1 tablespoon lemon juice

You will mix the walnuts, sugar and cinnamon in a big bowl.

Preheat oven to 350 degree Fahrenheit.

In a 8 x 15 pan begin to assemble your paklava.  First brush the bottom of the pan with the clarified butter and top with 3 sheets of phyllo dough.  Sprinkle a layer of nuts and top with 3 more pieces of phyllo dough then brush with a layer of butter.  Repeat this 5-6 times.  The last layer should only be phyllo dough.  Cut your raw paklava into diamonds.  Pour the rest of the butter on top.  Bake for 30-35 minutes at 350 degrees.

While the paklava is cooking create your simple syrup.  Stir in 2 cups sugar into 2 cups water with 1 tablespoon lemon juice.  Bring this to just under a simmer.  All you are trying to do is melt the sugar and get them to incorporate (no cooking or boiling here).  Once all the sugar is melted set the simple syrup to the side till the paklava is done cooking.

Once the paklava is golden and crisp take it out of the oven.   Pour all the excess butter out of the pan.  Pour your simple syrup over your paklava and listen to the delicious sizzle!  Use as much simple syrup as you want.


Armenians call this paklava but it is traditionally called baklava in other countries.

A couple of things to mention which I think are really important and will make or break your paklava:

1.  Be aware of how you like to eat nuts.  Personally I like the nuts chopped finely because it seems like everything is more incorporated, whereas my brother and dad like them with a rough chop so they get the chomp of the nuts.  To me both ways taste quite different and I definitely prefer a fine chop.

2.  The 5 layers is really important.  A lot of restaurants try to make this with 1 layer phyllo, one layer of nuts more phyllo, nuts then phyllo.  It's just not the same, it's quick and frankly it's lazy.   With the added layers the phyllo dough stays crisp and the pastry really does taste much more complex.

3.  Make sure and pour the excess butter out of the pan.  If you don't over time this will give it a more gummy chewy texture, and paklava should taste light and crunchy.

4.  Keep extra simple syrup around.  With the cooking technique when you dump the syrup on the paklava remains crisp, but some people prefer to have added syrup for soaping up all the little nuts and phyllo dough bits left on the plate.

This is by far the best paklava I have ever had ever anywhere.  I am not just saying that because it's a family recipe.  Really it's more of a technique, this is a pretty standard recipe.  The layers are what makes it, and what keeps it delicious for days (if it lasts that long).

I hope you have a chance to make this in your home!! The smell is out of this world, and despite all the butter if you look up the calories it really is quite healthy.  I mean nuts = protein right?  This is definitely worth the effort, you will never buy paklava again.

What is your favorite family recipe?  Will you share so I can make it too ? :) 

No Knead Bread Recipe

Let sit for 12-18 hours in a bowl covered in plastic
30 minutes of cooking and 15 minutes of top browning later
Perfection
I am the BIGGEST bread fan EVER!! There is no doubt at all that I am a French woman that is for sure! When I saw the "no knead" recipe on pinterest I nearly passed out from excitement.

I used this recipe from the Sullivan Street Bakery link

It's the simplest that I found after hours and hours of googling no knead bread recipes.  I put it in my own words below, because at least for me, it takes reading something 5 times before I understand it.

Basically all you need is:
 3 cups flour, 1 1/2 cup water, 1/4 teaspoon yeast, 1 1/4 teaspoon salt.  Water should be warmish.

Mix all this together and let sit for 12-18 hours in a bowl wrapped with plastic.  The longer it sits, the more sour-doughy it will taste (think fermentation).

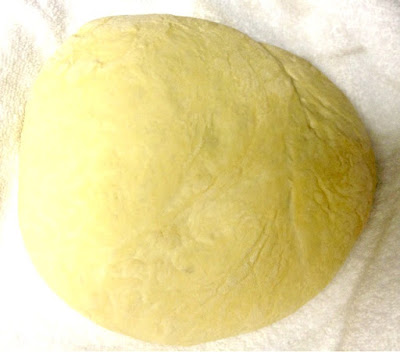
 Dump your dough out and fold twice.  Set this ball on a cotton towel for it to rise for 2 hours.   Flour ball of dough so it is less sticky.

I used a cast iron cauldron (thingy?)  Let that heat up in a 450 degree oven with lid for 30 minutes.  Carefully remove the pan and add your bread.  Cover bread and bake for 30 minutes on 450 degree.  Remove the lid and brown for an addition 15 minutes.

My gooooodness !!! This turned out better than I ever thought possible.  It was crunchy and had a thick crust on the outside, with a lots of holes and a springy center for the butter to absorb in the middle. 

What do you think? Will you try it? I know I will be eating this a lot since I eat so much bread anyways but hate to buy it at the store!!  Hope you enjoy too!

Find me on Pinterest!
Join my Facebook Group Connect and Share for Success. I’d love to help spread your content.
My Go-To Resources
Trim – Bill Negotiator Will negotiate bills with credit card companies and potentially get them lowered. Trim will also ensure that your subscriptions are cancelled across all your accounts. This is a full money-saving system for free. Tryout the Trim Bill Negotiator today and see how much you could be saving! 8 Million dollars was saved for users last year alone.
Ebates Coupons deals and cash back. When you’re shopping online if you aren’t stacking your savings, you’re losing serious money. Get rebates from 1%-20%+ on thousands of stores and get $10.00 for signing up. I won’t shop without Ebates.
Ibotta! I save on all my staples from eggs, to paper towels, to coffee and even uber rides! With Ibotta you just snap a picture of your shopping receipt and match it with current deals available online. Get $10 just for signing up through The Rising Damsel. Redeem your first $10 by verifying a purchase from any of their stores. It’s an obsession. 
Making Sense of Affiliate Marketing to earn money blogging. There are tons of ways to make money on your blog. If you want to make money by promoting an affiliate, you need Michelle’s course Making Sense of Affiliate Marketing. It was an invaluable resource to me despite 1,000+ hours of research on how to earn. The money didn’t actually start coming in till I took this course. Save yourself from frustration, Michelle has it figured out for us!

Edible Ornaments


Whip this up with some 2 bite brownies, frosting, rolo candies, sprinkles and ribbon.

So simple. Frost your brownies. Add a dab of extra icing on the top of each brownie. Curl your ribbon, and smoosh it in the extra frosting at the top. Place a rolo candy at the top to secure the ribbon and give it the appearance of an ornament.  Add sprinkles for extra sparkle.

The 2 bite brownies are the perfect size for "ornaments".  I tried almost this exact same thing with cookies, but with the size of the cookies and the amount of frosting needed well...it looked like a 3 year old went to town with finger paints.... not at all the look I was going for.  

This is perfect if you want to bring something unique and simple to a little party.  Takes seriously 5 minutes, tastes delicious and oh so cute.

I hope that everyone is getting to spend time with their loved ones this holiday season.  This is the best time of the year!! 

Before I go! Have you been trying to achieve financial independence? 

Proofread Anywhere might be the solution you are looking for.

Proofread Anywhere was created by the extraordinary Caitlin Pyle
Proofreaders consistently make up to $65 an hour and are able to work anywhere in the world. I’ve been following Caitlin’s money earning journey for years and she is the creator of Proofread Anywhere. Four years ago when she bought her first house with her earnings, I was enthralled with how she did it. It was all through proofreading, and she teaches us her exact ways.
This gig is obviously for a very specific type of person who LOVES to correct grammar, hates when authors use a comma splice, or makes note of spelling mistakes on a restaurant menu… it takes a certain “eagle eye” ability to be good at proofreading!
Now, how much can you make as a proofreader? Well, since I’ve been a Caitlin fan for a long time I happen to have a couple friends who are in that industry, and it turns out — quite a lot! There are some proofreaders earning over $40,000 working for themselves and loving their jobs. Completely free of office walls.
Leverage skills that you already have by starting a proofreading business! The handy webinar will quickly let you know if Proofreading is the right direction for you.
Ready to start your journey? Get free access to the Master Class Proofread Anywhere Webinar run by Caitlin by registering now. It’s a free way to see if proofreading is right for you.
My Go-To Resources
Trim – Bill Negotiator Will negotiate bills with credit card companies and potentially get them lowered. Trim will also ensure that your subscriptions are cancelled across all your accounts. This is a full money-saving system for free. Tryout the Trim Bill Negotiator today and see how much you could be saving! 8 Million dollars was saved for users last year alone.

Ebates Coupons deals and cash back. When you’re shopping online if you aren’t stacking your savings, you’re losing serious money. Get rebates from 1%-20%+ on thousands of stores and get $10.00 for signing up. I won’t shop without Ebates.


Ibotta! I save on all my staples from eggs, to paper towels, to coffee and even uber rides! With Ibotta you just snap a picture of your shopping receipt and match it with current deals available online. Get $10 just for signing up through The Rising Damsel. Redeem your first $10 by verifying a purchase from any of their stores. It’s an obsession. 


Making Sense of Affiliate Marketing to earn money blogging. There are tons of ways to make money on your blog. If you want to make money by promoting an affiliate, you need Michelle’s course Making Sense of Affiliate Marketing. It was an invaluable resource to me despite 1,000+ hours of research on how to earn. The money didn’t actually start coming in till I took this course. Save yourself from frustration, Michelle has it figured out for us!

Nom nom Spring Rolls


Yum ! If you are lucky like me and have a very old crock pot, it can be made into a deep fryer ! Just take that main cauldron out and add oil.

For these spring rolls, a mixture of ground meat, garlic, fish sauce, napa cabbage, peanuts, noodles, pepper, and soy was used. Really you can use anything though. We even made a few spring rolls using left over green chili (amazing). Make sure your rolls are nice and tight so they don't burst in the fryer. Fold them with a point towards you, not like a burrito. Fry till golden brown and enjoy.

I never ever fry things but this was definitely worth it especially if you can fry outside haha.  I don't know that the mess would have ever been gone otherwise.  

What have you tried lately that's a little out of your norm?

Had a bit of an emotional week, but I am back to my normal blogging schedule.  Thank you all for sticking with me. :)

Please Sir, I Want S'more Recipe


This was a smash delicious hit at work! It's simple and oh sooo yummy.
Recipe:
1.5 cup chocolate chips
14oz can of condensed milk
1 jar marshmallow fluff 
1/4 cup of cream

Bring everything up to temp together.  If you add the milk and cream after the chocolate is melted there is more of a chance that it will clump and you will definitely need a new batch of chocolate.  After this mixture is melted just dollop the marshmallow cream on top and stir.

A lot of recipes online don't call for the extra cream.  I knew that since I would be at work I wouldn't be able to serve it warm, so to ensure that it was a "dip" the extra cream kept it loose and spreadable.  It worked like a charm.  I am also a huuuuuge fluff fan, so 1 jar instead of the normal 1/2 a cup kept the mixture smooth and not overly chocolatey (it's suuuuuuper chocolatey don't worry).  You guys know me and my sprinkles, sprinkle away and serve with graham cracker sticks.  So good !! 

Rice cake sticks

Many many years ago my friend took me to a Korean Restaurant and ordered something called Dok Boki.  It was this red sauce of delicious doom.  My eyes were tearing, my nose was running I was practically crying it was so spicy.  I just couldn't stop chewing though!! I have a huge love for food with odd textures.  Rice cake sticks are one of my favorite things to chew.  12 years later I found these little oddities in an Asian market.  My life has now changed.  

Mine were vacuum sealed.  Open the package and soak them in water for 10 minutes.  They are suppose to be soft when you cook them.  If they are not soft, drop them in hot water and let simmer till they are.  Heat up some oil in a skillet and throw them in.  Saute til they have a slight brown color.  I burnt mine a bit because I am a weirdo and like things with a charred taste.  Mix up some sauce I used spy sauce, garlic, onion, chicken bouillon, bulgogi sauce and oyster sauce slurred together with water and flour.  Let this thicken add veggies (I used baby bok choy) and mix with your rice sticks.  So absolutely delicious !
What new old favorites have you tried lately?

Garlic Cucumber Cheese Dip

Recipe:
2 8 oz boxes of cream cheese
2- 5 cloves of garlic
1 cucumber
1 bag cheddar cheese 
salt and pepper

This dip was at a craft fair that I went to when I was around 11.  It has been a favorite ever since. Seriously this dip is easy and delicious and cheap!  Gut the cucumber so it doesn't water down the dip.  Mince the garlic and then mix in 3/4 of a bag of cheese.  Shape into a ball and then pat the rest of the cheese on the mixture to make it pretty pretty.

I think it tastes great with Ritz crackers, but it's absolutely amazing as a cream cheese schmear for bagels!  This is a perfect party appetizer with some wow factor !  It is definitely an odd combination of flavors, but the cucumber makes it fresh and the garlic makes it full of flavor.  Don't be scared seriously everyone at work devoured it.  Be considerate of others tolerance for garlic.  I actually had to go back to the store because it was soooooo garlicky it practically burnt my tongue haha.  If that happens to you too just add more cream cheese, but add a little garlic at a time because otherwise you will be heading back to the super market :P  Yum !! Hope that you try it and enjoy! 

Spiced Up

Wooo after a little pressure from some coworkers, it was declared bake day. I think I was duped but at least we ended up with this right? This is an easy, easy cake that looks difficult and tastes delicious despite the amount of effort (or lack there of) that you put into it.

Recipe:
boxed spice cake
cream cheese frosting
jarred caramel
sugar

Make the cake exactly as the box says to make it. I made a 2 layer cake. On each layer poke a bunch of holes and drizzle jarred caramel over it. The caramel will soak into the holes and make the cake moist ! Don't worry it won't make it soggy at all.  Frost between layers. Then drizzle caramel all over the top.

Create a sugar sculpture by heating sugar up in a pan. Be very careful!! Don't use any water or anything just let it melt; do this on no higher than medium. Don't stir the sugar till it starts to melt, start to mix and let boil till it gets a nice caramel color. Pour onto a sheet pan lined with tin foil to cool.

Unfortunately I don't have a covered cake tray, so I ended up making a bunch of what tasted exactly like brittle and sticking it randomly in the cake. I kind of like the crystal like appearance of it. Of course you can do the fancy version too!! This cake tasted amazing with the extra umph of caramel and brittle it seemed more special too.  No one has to know how easy it was! Also I wouldn't suggest making this for less than 6 people because you will eat it all. Enjoy!

Scallion Pancake

This is seriously the easiest "Recipe" ever.  If you have ever had Korean bbq this is what a Korean Pancake is.

Ingredients:
Soy sauce
1/4 cup flour
2/3 cup water
scallions

Mix all the ingredients in a bowl.  I use an entire bundle of scallions for this.  The mixture should be very very loose more like a liquid than an actual batter, even thinner than crepe batter.  I like to mix the soy sauce in before cooking so that the flavor is incorporated.  Use a cooking spray or vegetable oil to coat the bottom of a non stick skillet, and dump your mixture in after the oil is nice and hot. 
Wait till you see a crispy outside and bubbles forming before you flip it.  This actually takes a surprising amount of time.  Close to 20 minutes I would say, flip after about 10.  The scallions will be nice and soft and the dough turns out really smooth and slightly chewy, seriously one of the best textures ever.  I like to take it off the stove while the middle is still slightly moist, but that is totally up to you.  I have no idea how flour and water creates something so amazing.  
I guarantee you have seen people grow scallions on pinterest. Let me tell you it works completely !! They grow faster than weeds. Within 3 days you have a new harvest. Just put the root ends in water and be amazed.

What is your easy go to food that can be made from super simple ingredients ? 

Oreo Balls with Sprite Sprinkles

Ok so any pinner out there has seen this recipe. What you may not realize is how great they are, and how absolutely everyone who eats one will pretty much go bonkers!  So worth making for any event.... and I would suggest an event because you might eat the whole batch.

recipe:
1 package oreos
1 package 8oz cream cheese
3/4 bag of semi sweet bakers chocolate
lots of pretty sprinkles.

It's best to use some sort of food processor to crunch up the oreos to a pulp.  Dump the cream cheese on top and with clean hands squish it all together.  Create balls about 1' in diameter ... mine are probably a little smaller.  This yields about 45.  Put your balls on a piece of parchment and throw those puppies in the freezer for at least 20 minutes.  While they are in the freezer melt your chocolate in a double boiler.   Then dip your balls and decorate as you dip, you don't want the chocolate to harden before you get your glitters on them.

A few tips:
Make sure that the truffles are nice and cold before you try to dip them.  I used a thin knitting needle to dip them, it allows you much more control than a stupid tooth pick.  I used a tooth pick before, and it took about twice as long. Not only that but the balls weren't as consistently covered because you couldn't shake the extra chocolate off.  Oh and don't be turned off by the fact that your balls look like monster rabbit poop before you dip, and don't be surprised if whomever tries them asks for your "sweet sweet balls in their mouths again" everyday. 

Anyone catch the Rainbow Brite reference in the post title? Couldn't resist. 


Baked Potato Chips


Cook
Cook
Cook :)
Yum!! Baked potatoes are one of my favorite foods ever! Trouble is they take so long to cook. This takes at least half the time, and the result is crispy delicious flavor in every bite!

For this all you need is cooking spray or olive oil, a potato of your choosing and toppings for that potato. I would definitely recommend slicing up a sweet potato or yam and topping it with marshmallows and caramel too.

Slice the potato as thin as you can get it. The thinner the slices the quicker it will cook, and the crispier the chips will get. Cook until tender/crisp.  I believe I cooked my "chips" for around 20 minutes.  As you can see I like my food slightly burned ha! The middle of the potato is still soft just like a baked potato, but the outside has great flavor and texture. I topped mine with scallions, cheddar cheese and sour cream.  Hope you enjoy!  Do you have any go-to recipes when you need delicious quick, fast and in a hurry?

Soy Squirt

Yum! YUM.  I love my soy sauce.  Trouble is with that "easy pour" bottle I tend to dump about 5 times too much on my food.  My over zealousness with the bottle prompted me to do this!  If you go to the Dollar Store, you can get a set of 3 squirt bottles for... surprise a dollar!  This ensures even soy flavoring over all of your food.  Just pour some soy sauce in that squirt bottle.  You can do this with any liquid that you might want to be more sparse with.  Here is the link to what is on that plate.  What are your easy kitchen tips ?

Quinoa

Quinoa is my new favorite thing to cook! It's quick and easy. The texture is out of this world, kind of like couscous but with a snap. The taste is a little nutty mixed with a brown rice.

 The first thing you need to do is prepare your quinoa. That means rinse, rinse, and rinse. Whatever is on the outside of quinoa makes it taste very bitter. So you need to make sure and get all that stuff off.

To cook add 1 cup quinoa to about 1 1/2 cups water. Bring that to a boil, reduce the heat to a simmer and cover that pan. 10-15 minutes later the water should be all gone and the quinoa should be tender.

To flavor the quinoa I added some chicken bouillon, garlic powder salt and pepper to the water and raw quinoa mixture.

The magical thing about quinoa is you can pretty much use it for anything. Replace any of your other grains with it, make a salad out of it, use it to bake pizza bites, add egg and fry to make quinoa patties. In my case I sprinkled it with cheddar cheese and added an over easy egg on top. The yolk dripped into the cheddar and quinoa and it was perfect !

Have you tried quinoa ?  How would you describe the taste and texture?

Vegeterian Kifta recipe

3 cups dry bulgar wheat. ( After you soak it in 3 cups of water overnight it will yield 6 cups).
1 cup finely chopped onions (raw)
1 cup finely chopped green peppers (raw) 1 cup minced parsley (raw)
1 & 1/2 can of tomato PASTE (not tomato sauce)
1/2 cup olive oil
1 teaspoon allspice salt and pepper to taste.

Soak the bulgar wheat in a bowl over night in same amount of water. 3 cups bulgar soaked in 3 cups water will yield 6 cups bulgar for the recipe. The water can be room temperature. Get a very large bowl.

Put the softened bulgar wheat, onions, peppers, parsley & tomato paste into the bowl. Knead this together with your fists.

Once very well incorporated and 1/2 the oil. Keep kneading. Add the allspice, salt and pepper to taste. Knead again. Add more oil until you can form kifta balls that do not fall apart. It's important to really knead the mixture, even squeezing the mixture in your hands letting it ooze through your fingers.

Once you're satisfied with the taste and have the seasonings just right, use your hands to scoop up enough of the mixture to form into an oval shaped ball the size of a kiwi. All of the above ingredient amounts can be altered to taste. The amount of olive oil will depend on the mixture holding together when you form a 'ball'. The mixture should be a deep red color so add tomato paste generously. Press the mixture into your hand till it feels solid. Place them all on a plate. You can serve them as is or you can serve them with rinsed grape leaves. If you want the grape leaves just place the kifta ball into the middle of the leaf and wrap the leaf around it. I like to put a bit of cayenne pepper on my plate and dab a smidge on my kifta with each bite, This is an extremely tasty and nutritious meal. Enjoy!

You probably noticed above that the picture I took did not feature the kifta in a ball.... after 5 servings you start just shoving it in your mouth.  SOOOOO good !