google.com, pub-1695019095451303, DIRECT, f08c47fec0942fa0 Heart & Thrift: diy
Showing posts with label diy. Show all posts

Clutch My Heart Purse DIY


This was a small purse I got from a thrift store.

Just start sewing buttons anywhere you please. I went out and bought some specialty buttons to spice it up a bit. You can get a great vintage button multi pack from amazon here.

I love how my little clutch turned out ! Might not be luxury but it's unique and mine.  The color options are so endless ... vintage buttons = steampunk... oh that might be next.

Check out these 18 Purse Essentials for Everyday Needs. Make your life easier!

There are so many different options when it comes to style have fun!

Before I go! Have you been trying to achieve financial independence? 


Proofread Anywhere was created by the extraordinary Caitlin Pyle
Proofreaders consistently make up to $65 an hour and are able to work anywhere in the world. I’ve been following Caitlin’s money earning journey for years and she is the creator of Proofread Anywhere. Four years ago when she bought her first house with her earnings, I was enthralled with how she did it. It was all through proofreading, and she teaches us her exact ways.
This gig is obviously for a very specific type of person who LOVES to correct grammar, hates when authors use a comma splice, or makes note of spelling mistakes on a restaurant menu… it takes a certain “eagle eye” ability to be good at proofreading!
Ready to start your journey? Get free access to the Master Class Proofread Anywhere Webinar run by Caitlin by registering now. It’s a free way to see if proofreading is right for you.
My Go-To Resources
Credit Sesame I used Credit Sesame to lower my credit card debt and start saving money. I would have never been able to afford my car for cash, or pay off my debt without learning about my credit score first. Credit Sesame provides free service and a free credit score. Check them out to see how they can help dig you out of debt today. You won’t be sorry, I can’t believe how much they helped me.
Rakuten Coupons deals and cash back. When you’re shopping online if you aren’t stacking your savings, you’re losing serious money. Get rebates from 1%-20%+ on thousands of stores and get $10.00 for signing up. I won’t shop without Rakuten.
Ibotta! I save on all my staples from eggs, to paper towels, to coffee and even uber rides! With Ibotta you just snap a picture of your shopping receipt and match it with current deals available online. Get $10 just for signing up through The Rising Damsel. Redeem your first $10 by verifying a purchase from any of their stores. It’s an obsession. 
Making Sense of Affiliate Marketing There are tons of ways to make money on your blog. If you want to make money by promoting a company or product you need Michelle’s course Making Sense of Affiliate Marketing. I didn’t actually start earning money from blogging till I took this course. Save yourself from frustration, Michelle has it figured out for us.

Alexander McQueen DIY Butterfly Sweatshirt

These sweatshirts make being lazy look great! I think the whole comfortable cute thing is working in our favor this season. A huge trend I am seeing right now is patches !! patches !! patches !! The Alexander McQueen Sweater at $1,075 is screaming to be DIY'd.

The cute butterflies are right here Amazon here. Once you get your sweatshirt, a handful of patches, and an iron you will have all you need to make this sweatshirt that's stylish and comfy.


Alexander McQueen embroidered topButterfly iron patchJ Crew floral print topBrown Bear, SweatshirtVintage topBow SweaterEmbroidered SweaterFeather top

Check out these 18 Purse Essentials for Everyday Needs. Make your life easier!

I hope you enjoy! Share your butterfly sweatshirts if you make them. Hit me up with your color combos!

Before I go! Have you been trying to achieve financial independence? 

Proofreaders consistently make up to $65 an hour and are able to work anywhere in the world. I’ve been following Caitlin’s money earning journey for years and she is the creator of Proofread Anywhere. Leverage skills that you already have by starting a proofreading business! The handy webinar will quickly let you know if Proofreading is the right direction for you.
My Go-To Resources
Trim – Bill Negotiator Will negotiate bills with credit card companies and potentially get them lowered. Trim will also ensure that your subscriptions are cancelled across all your accounts. This is a full money-saving system for free. Tryout the Trim Bill Negotiator today and see how much you could be saving! 8 Million dollars was saved for users last year alone.
Rakuten Coupons deals and cash back. When you’re shopping online if you aren’t stacking your savings, you’re losing serious money. Get rebates from 1%-20%+ on thousands of stores and get $10.00 for signing up. 
Ibotta! I save on all my staples from eggs, to paper towels, to coffee and even uber rides! With Ibotta you just snap a picture of your shopping receipt and match it with current deals available online. Get $10 just for signing up.
Making Sense of Affiliate Marketing If you want to make money by promoting an affiliate, you need Michelle’s course Making Sense of Affiliate Marketing.The money didn’t actually start coming in till I took this course. Save yourself from frustration, Michelle has it figured out for us!

Golden Roses Luxury Inspired DIY

I love to create! Especially when I can make something chic for cheap. This necklace is inspired by Oscar De La Renta. This necklace is quick and easy to make and you will love the results.


I always have so much fun when I start to work with Sculpey Clay. The possibilities are literally endless and so are the colors, it's a cheap staple from Amazon and it's so easy to work with. This  pack of Sculpey is great because there are so many different color options for future products.

To make the gold pieces:
1. Roll your clay into a cylinder and cut out notches
2. Smoosh and use a toothpick to smooth out the edges. 
3. Once baked you can take a piece of sandpaper and smooth it out further.

A quick google search on "how to make clay roses" will fix you up if you have never made them before.

Personally I think they tend to look a little bit more vintage if you make the clay thinner on the edges of the petals. Once your rose is formed cut the base off so it will lay flat. Bake all clay per the directions on the package.

To enhance the gold pieces I painted them in an antique gold acrylic, this also helped them to look more uniformed.

Take a piece of felt or faux leather and hot glue your clay pieces to the felt. Add a chain and you are done!

I love this design because despite the delicate nature it is quite versatile and can be worn with almost any outfit.

What other food techniques have you used to enhance your jewelry? Fondant roses anyone?

Inexpensive Hat Upgrade DIY


IMG_7008
IMG_6640

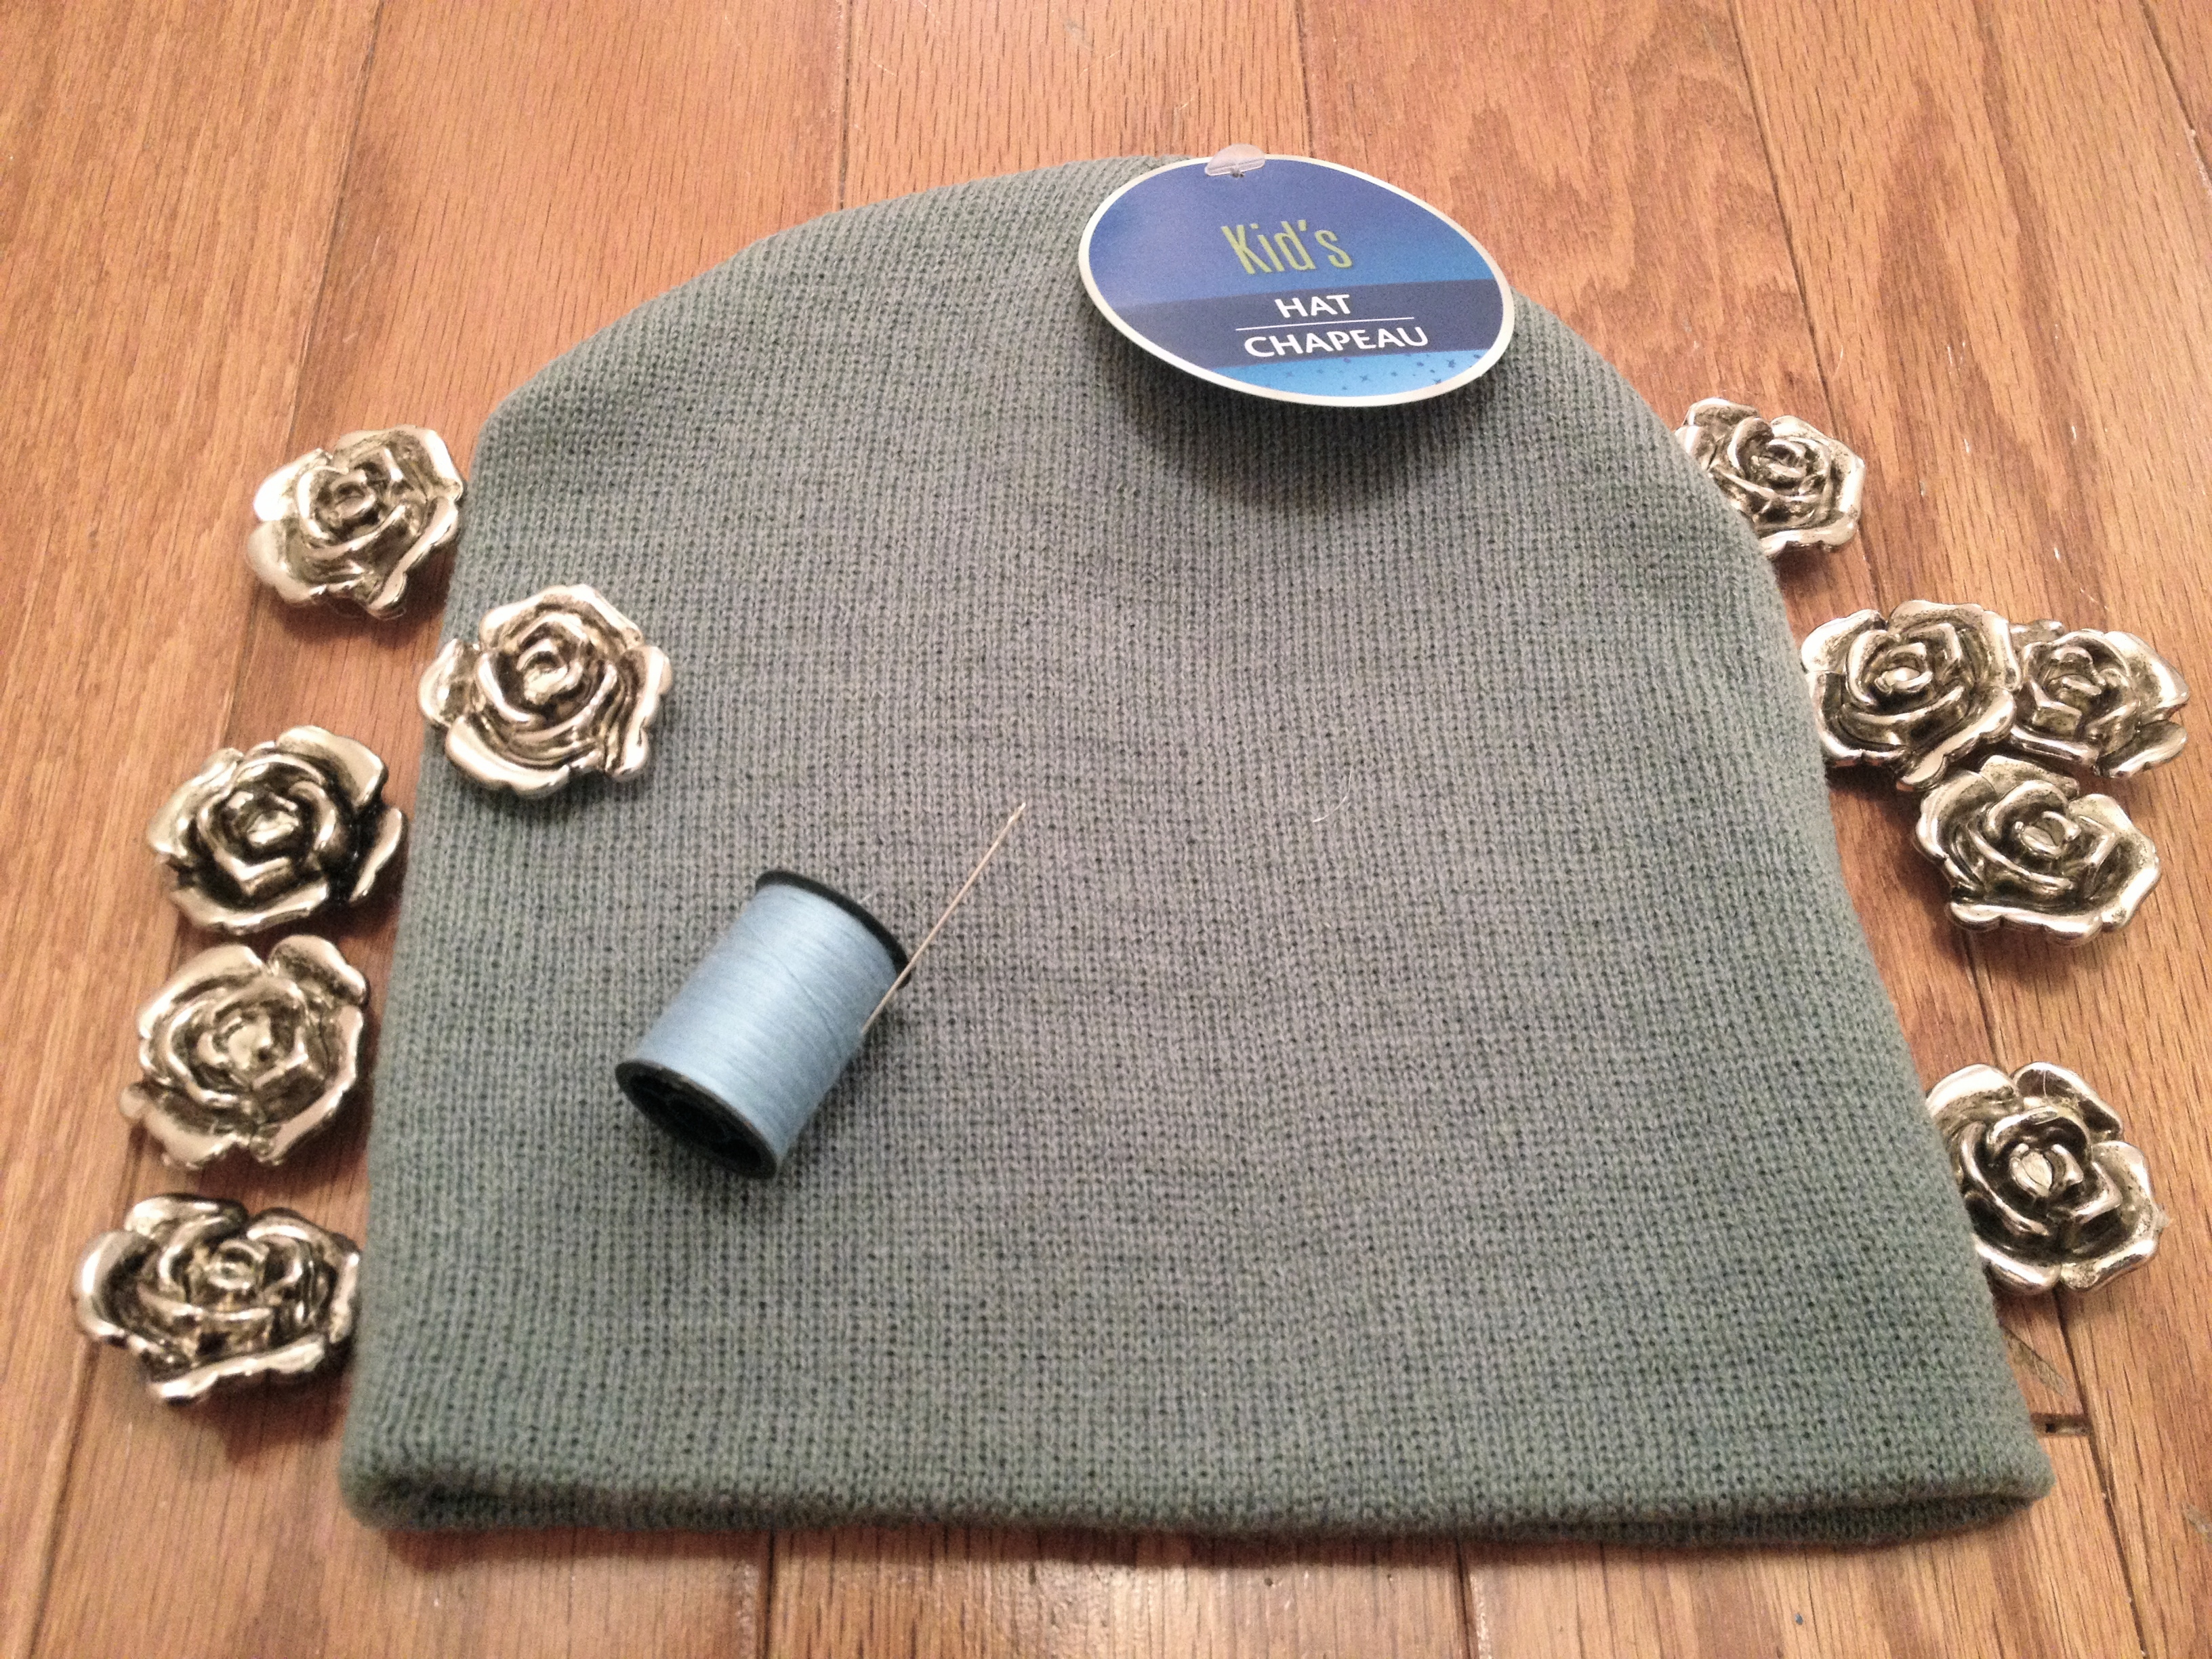
I just fell in love with the color of this hat when I saw it at THE DOLLAR TREE?! Ya. They actually have some pretty cool (very basic) items in the winter months, start looking now!

Most craft stores cycle their sales like clockwork.  Be on the lookout for coupons, usually a 40% off one item is available at all times.

I never buy anything at a craft store unless it's on sale. These metal flower beads were 40% off $7.50.

Wish I could have bought these: metal slide beads ha maybe it's time to make another hat?

Constant craft sales make a huge difference to your pocket book when you are addicted.  Just stitch your favorite beads (of the day) on any hat and voila!

Join my Facebook Group Connect and Share for Success. I’d love to help spread your content.
If you are looking for a free Tailwind Tribe try The Rising Damsel’s : Promote Your Blog – A Rising Damsel Tribe. Much Love!! Together we will be great!

My Go-To Resources

Trim – Bill Negotiator Will negotiate bills with credit card companies and potentially get them lowered. Trim will also ensure that your subscriptions are cancelled across all your accounts. This is a full money-saving system for free. Tryout the Trim Bill Negotiator today and see how much you could be saving! 8 Million dollars was saved for users last year alone.
Ebates Coupons deals and cash back. When you’re shopping online if you aren’t stacking your savings, you’re losing serious money. Get rebates from 1%-20%+ on thousands of stores and get $10.00 for signing up. I won’t shop without Ebates.
Ibotta! I save on all my staples from eggs, to paper towels, to coffee and even uber rides! With Ibotta you just snap a picture of your shopping receipt and match it with current deals available online. Get $10 just for signing up through The Rising Damsel. Redeem your first $10 by verifying a purchase from any of their stores. It’s an obsession. 
Making Sense of Affiliate Marketing to earn money blogging. There are tons of ways to make money on your blog. If you want to make money by promoting an affiliate, you need Michelle’s course Making Sense of Affiliate Marketing. It was an invaluable resource to me despite 1,000+ hours of research on how to earn. The money didn’t actually start coming in till I took this course. Save yourself from frustration, Michelle has it figured out for us!

Fan Globe Revamp DIY

My mama is redoing her room. She wanted to add a little pizzazz to the lighting. We bought a typical fan with a globe. We decided hot glue and accent stones would be perfect. I know you have seen these at the store... flat on one side round on the other, also great for magnets and pendants..

 This is super easy. Just get your hot glue.... hot. Create a pattern or design with the accent rocks and get to gluing.  Leave room for the knob at the bottom of the globe.  It's a crucial step so that the lamp pulls will have space to come out.

For my house I would skip the bits of yellow, but for her room it's divine ! Can you imagine these beautiful royal blue gems strategically place instead ?  I swoon.  You can also buy table scatter at Michaels don't forget your 40% off coupon that is readily available through their website.  I am incredibly guilty of hoarding my table scatter ha.

She Sells Seashells DIY


This is quick and simple! All you need is a shell, some black paint, a chain and a bale.

Dip your shell in the black paint and add definition with a brush. Let it dry and glue on your bale and add your chain.

Perfect accessory for any season or outfit!

Create a Button Tree - Earring Storage and Decor

IMG_6828
IMG_6810
IMG_6805
IMG_6804

 
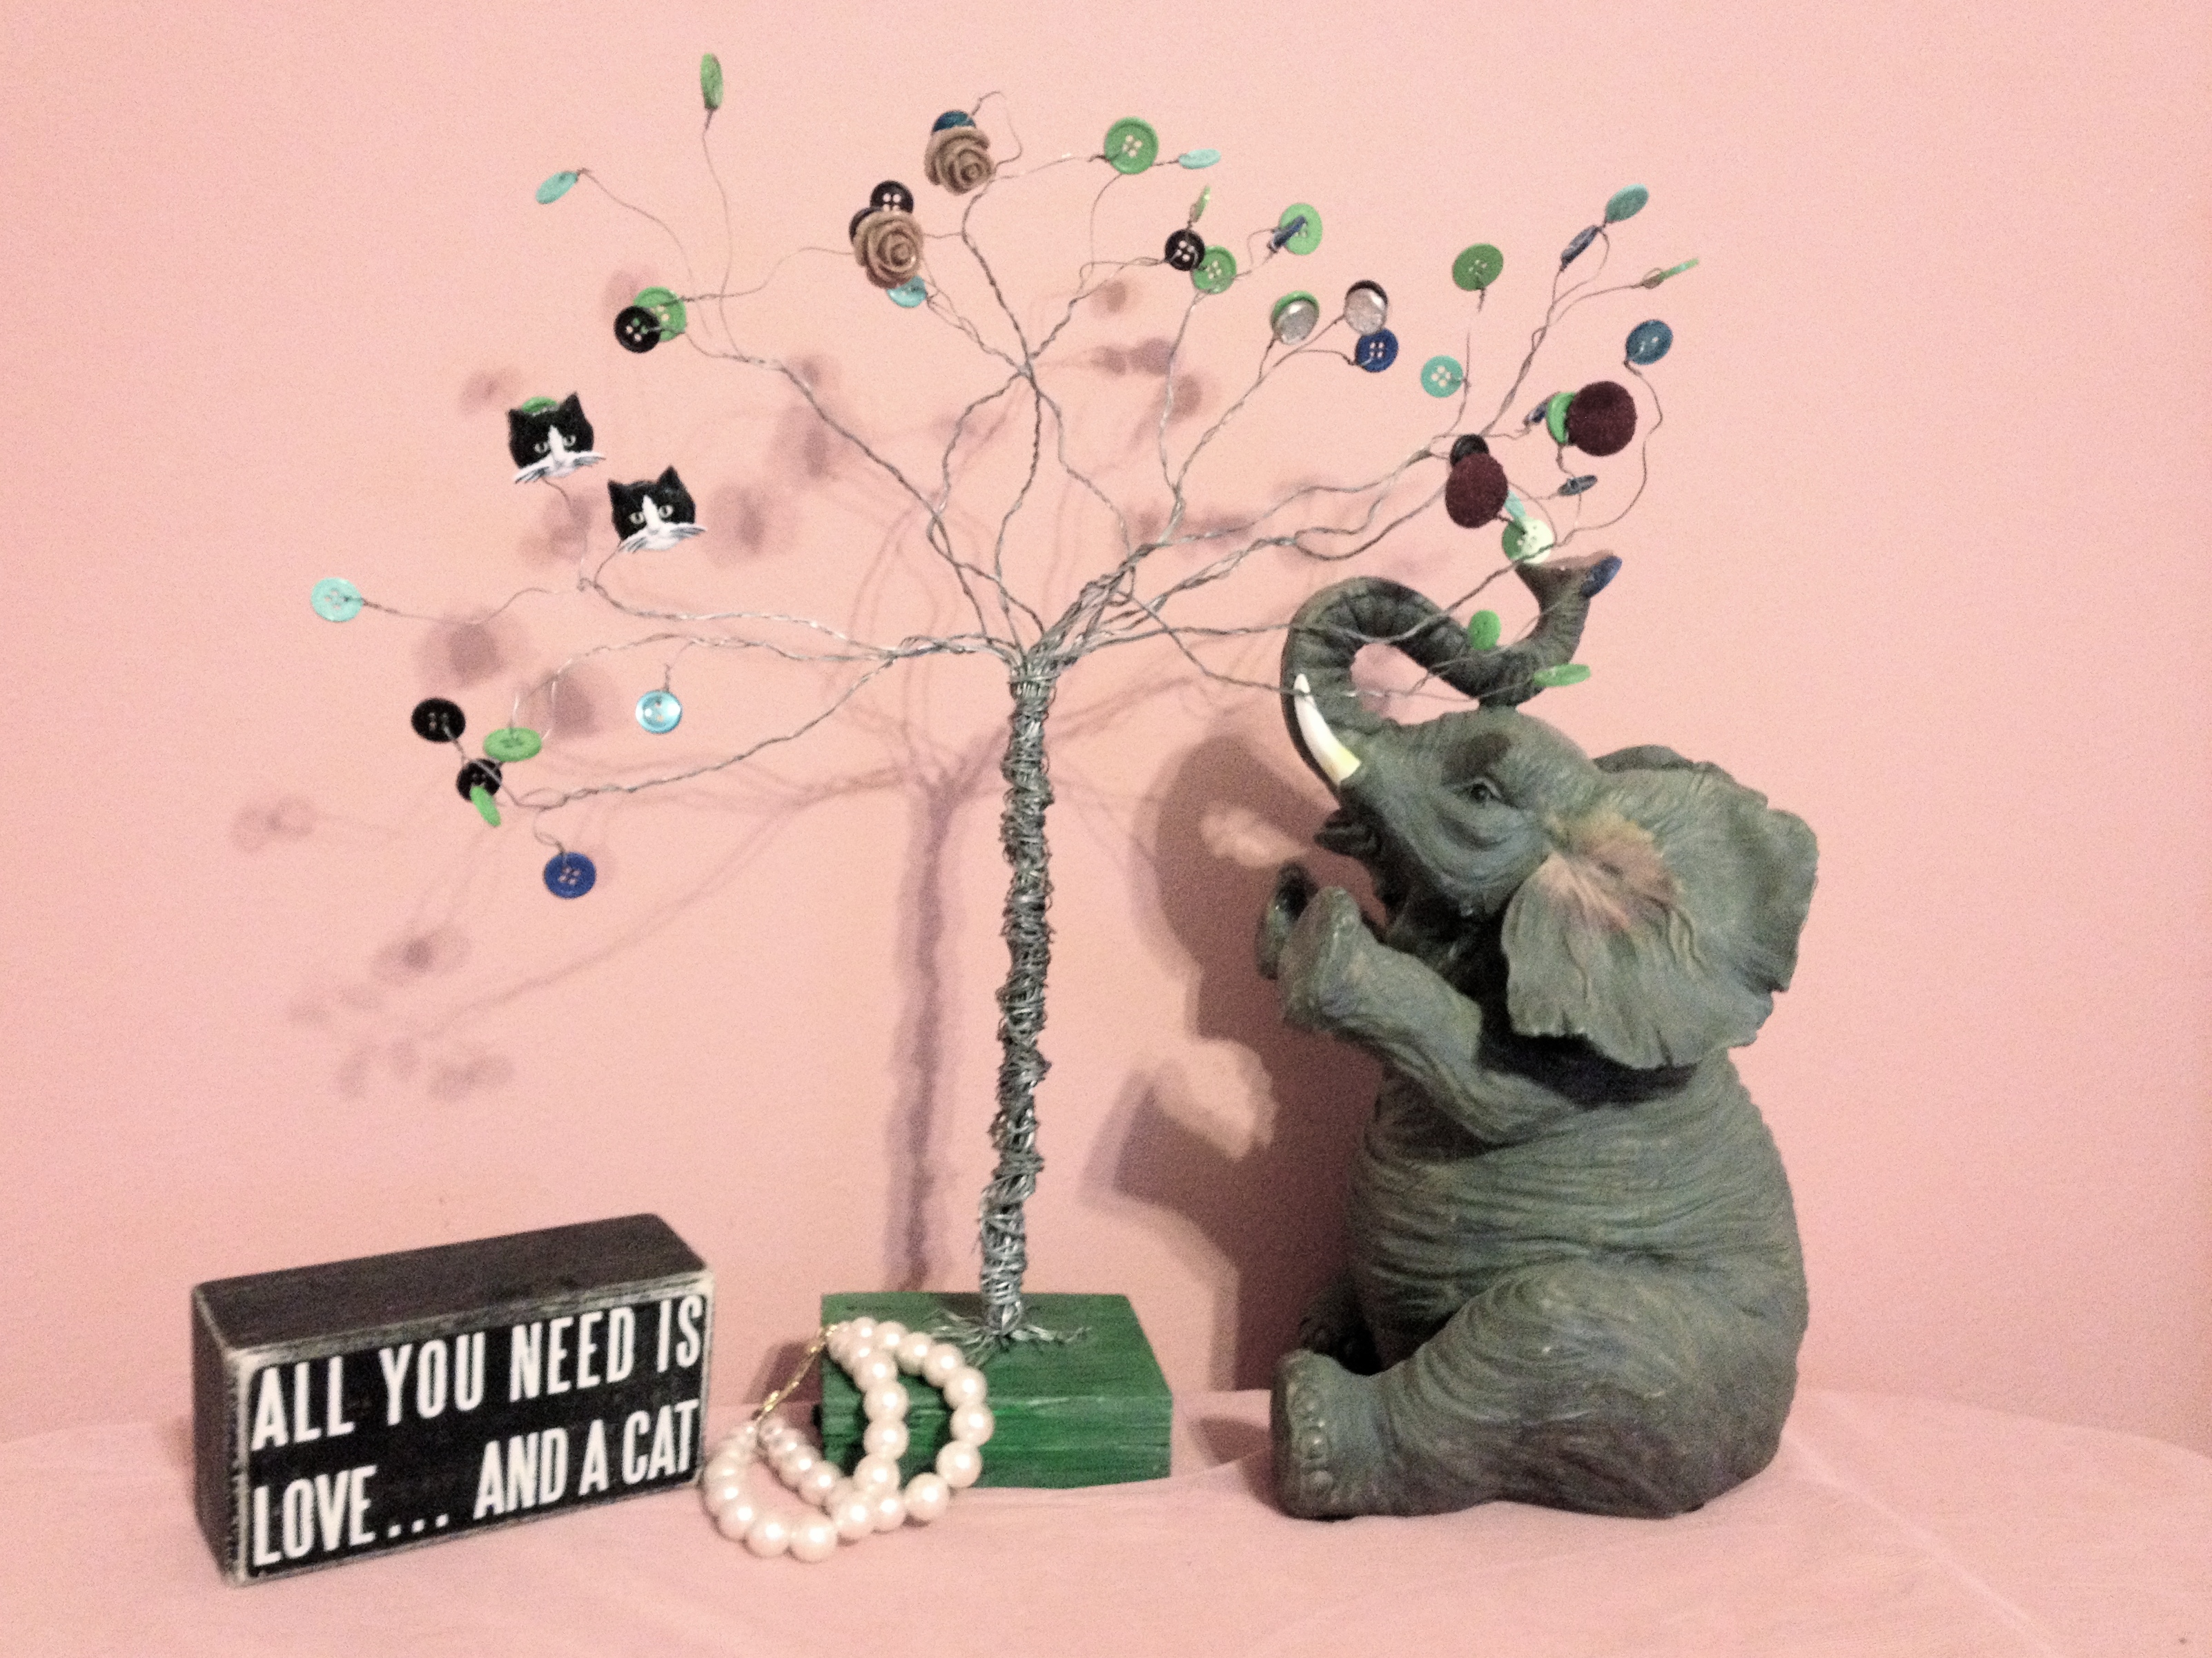
So many earrings in my life !  Lets get them all rounded up. For this you will need a block of wood, hot glue, crafting wire, wire cutters, paint and buttons you can grab a big bag from Amazon here.

1. Start cutting your crafting wire. My tree is about 1 foot 5 inches tall. Cut crafting wire approximately 2 feet long. Due to the amount of buttons I wanted on my tree I cut 39 of these.
2. Twist bundles of wire for your branches.  As you can see bundles of 3 provided good support for the earring weight. Spread bundle out on end.
3. Attach button to each "tree branch".
4. Grab all the branches and bundle them together. Take more craft wire and wrap the bottom till it appears trunk like.
5. I painted the wood green and hot glued the "trunk" to the base.

Vintage buttons would add an entirely different feel to the design and you could add anything to the base to match your home decor ... seashells for the bathroom with nautical buttons?

Hope you enjoyed this !! Super fun and easy.  I would suggest using gloves while wrapping the wire as it can get a little pokey.  One day I may make a mini version of this wire tree for a brooch or even a necklace charm.

Check out these JK Rowling Quotes That Will Inspire Your Life

My Go-To Resources

Credit Sesame I used Credit Sesame to lower my credit card debt and start saving money. I would have never been able to afford my car for cash, or pay off my debt without learning about my credit score first. Credit Sesame provides free service and a free credit score. Check them out to see how they can help dig you out of debt today. You won’t be sorry, I can’t believe how much they helped me.
Rakuten Coupons deals and cash back. When you’re shopping online if you aren’t stacking your savings, you’re losing serious money. Get rebates from 1%-20%+ on thousands of stores and get $10.00 for signing up. I won’t shop without Rakuten.

A Little Heart Brooch Chanel Inspired DIY


IMG_7615IMG_6698Chanel-Couture-FallWinter-2012-2


This might actually take longer than you would expect, but I am loving the results!

All you need is plastic canvas, yarn, a hook, and a needle.

You can get your plastic canvas here.  I went a really long time not knowing what that magical stuff was called.

Stick and shove as much yarn into each hole as you can, weaving in and out of each space till you can't possibly shove any more yarn in.  Put your favorite movie in this is gonna take a while!  I would recommend Amélie.

String and Pearl Wrap Bracelet DIY


Stash buster! You will need roughly 5 spools of embroidery floss or crochet string for this, an old plastic bracelet, beads and a drop of glue. String, beads and glue are always available at your local craft store or hit up Amazon's Craft Section

Start with a knot and wrap, wrap, wrap around the bracelet. When threading the bead center the bead, wrap string around the bead once, wrap around bracelet once. Center bead again and then wrap the string around the bead twice. Continue to wrap around bracelet till you are ready for your next bead. A dab of glue and you are done.

There are infinite color possibilities and I know none of us are missing for beads.

Vintage Appeal Necklace DIY


For this all you need is some simple jewelry hardware.  String your beads and attach them to your chain using jump rings. I got my beads on sales at Michaels for 90% off.  Rummaging through the bargain bins is worth it ! Determine how much you want the beads to separate from the chain by where you attach the jump rings. The slight vintage feel of these 90% discounted beads has me singing.

Making an Easy Jacket Brooch

You can pick up these amazing metal pieces for $2.00 at Michaels.  Hot glue a pin back to create a brooch! I have been looking at objects much differently lately. If something weighs less than 3ozs you can probably turn it into some wearable art to spice up your wardrobe.

Have you adorned your clothes with anything weird lately?  I am thinking branches next. 

DIY Anthro Inspired Glitter Earrings

For this simple diy all you need is some gold glitter, glaze, stiff paper and basic earring hardware.

Just Glaze and glitter !
Original version from anthropologie $35
I love them !! Took a total of about 10 minutes if you don't count the dry time. I simply used a needle to make a small hole for the earring hardware. Voila! Total cost was maybe a $1.00.  I usually stick to silver tones, so this is the perfect diy to try if you want something cheap and different.

Buttons Up The Front Skirt DIY


My first thrift store revamp.  Basically, I cut the elastic out of my parachute skirt and used a fitted skirt as a guide.

I didn't want to get too crazy so I added an elastic band.  The buttons on the original skirt ran up the back of the skirt.  Seeing as I am a huge button fanatic I changed them to the front.

Seriously have had this project on my mind for the last year.  Feels great to have something accomplished and wearable... even if the buttons are off ... my patience factor and sewing don't get along.

What are your favorite clothes to refashion? So far I am sticking to skirts and straight lines.

A Different Sort of Pearl Earring


blouse: Sammydress

Whip this up with some wire, 2 sizes of the same bead, hook earrings and crimp beads.  All my supplies are from Michaels for this little project. 

The wire will add some stability to the tear drop shape of your earring, but you can absolutely use anything from mono-filament to string to thread as well.  Really the options are just about endless with this quick and easy design (stash buster!).  Enjoy your new earrings!

A little Heart


Outfit Details:
scarf: handmade / jeans: BDG / shirt: Mango / sweater: Talbots / shoes: Coach / brooch: handmade

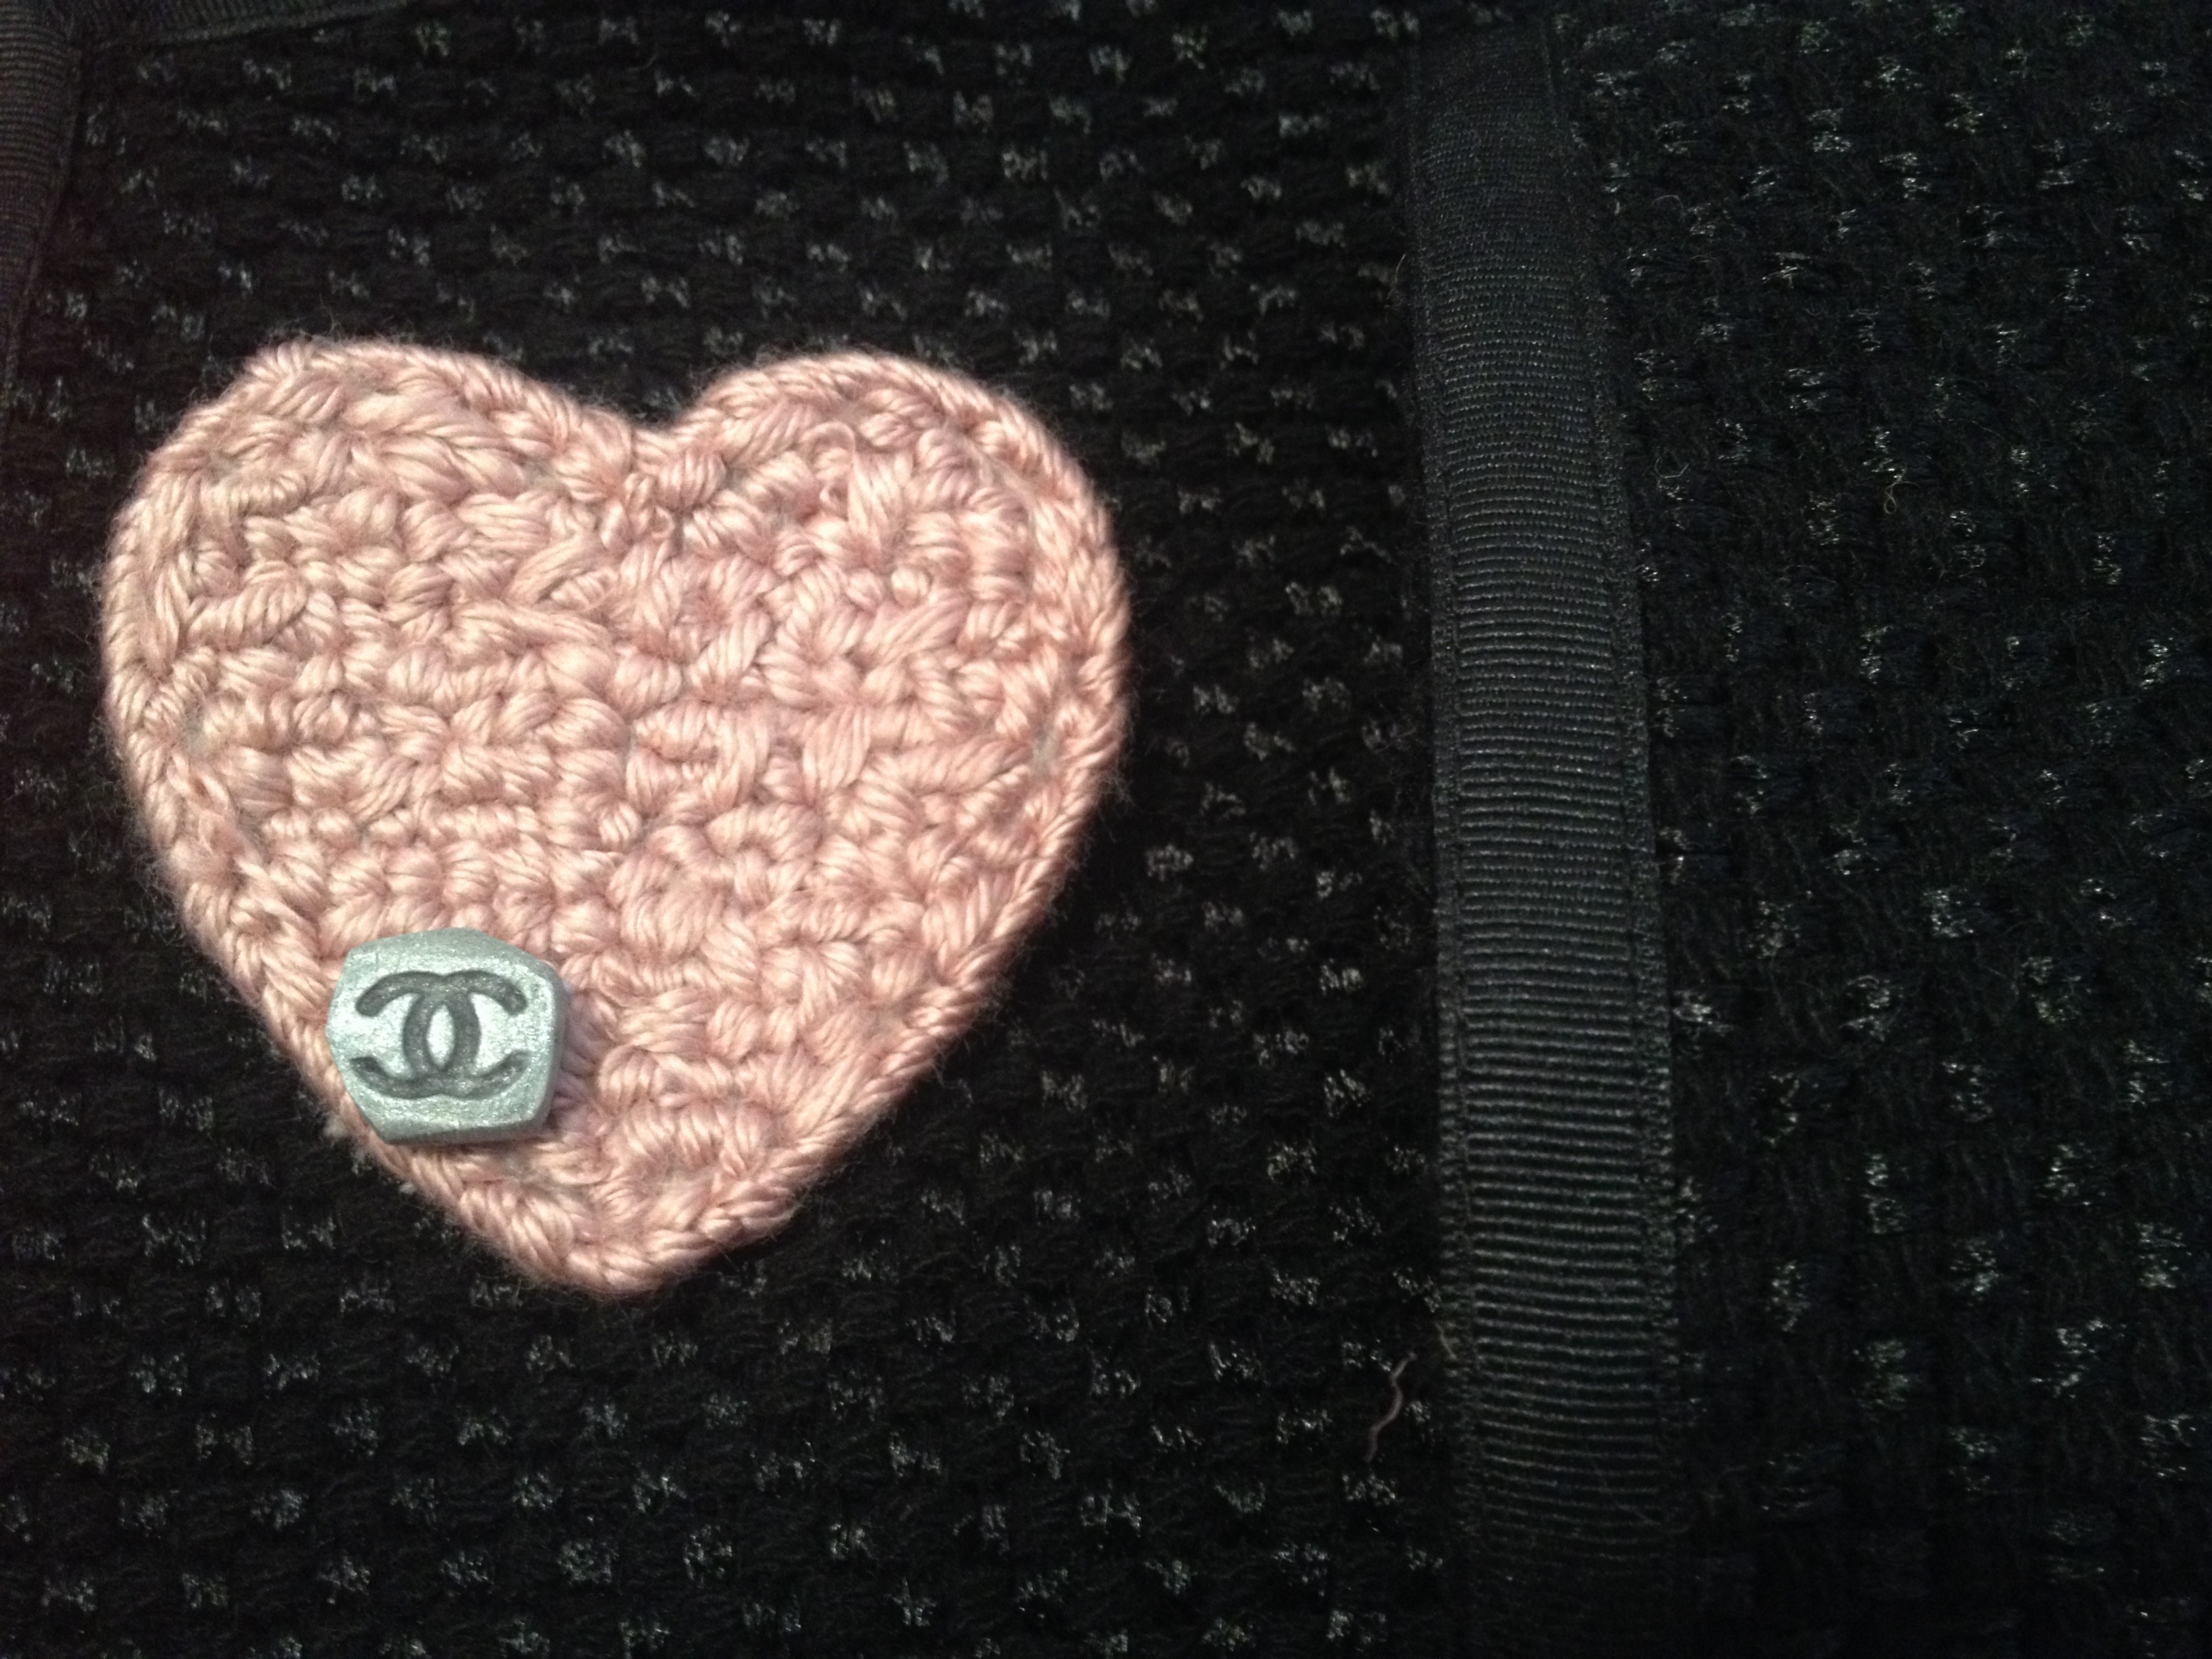
For this all you need is some polymer clay and a cookie cutter.

Roll out your clay. I wanted a substantial heart, something more for jackets and sweaters. 

I rolled the clay out to approximately 3/8th of an inch thick.

Bake according to the directions.

Let your heart cool down.

Paint it up however you please.... glitter? splatter? pick your fancy!

Glaze and add a pin back.

How many of you are going to go through your cookie cutter drawer now to see what else you can make?  I foresee this brooch as a year round obsession.

Seed Bead Ombre Necklace


Grab some seed beads, some plastic string, and some clasps to create this lovely little creation.

I did 6 strands total, 3 sets of 2.

Seed beads are little bit time consuming, but so worth it in the end.  I found that the easiest way to use seed beads is to put 20 or so in your hand and stab at it with your string.  Does anyone else know an easier way?  The pretty seed beads from Michaels are not the ones I used but the color variation would be perfect for an ombre effect if you desire.

I was really pleased with how this turned out.  The beads were about $4 total, so I probably used 75 cents worth.  This definitely brought memories back of my first attempts at daisy chains. 
 

Charms From Vintage Clipon Earrings DIY


My mama gave me a huge bag of jewelry that she got at a garage sale for $10.00. So what do you do with 5 pairs of clip-on earrings that look the same?

Well turn them into a necklace why don't you? Clip-ons are really quite perfect for jewelry making since the clip on back is so secure. I arranged the earrings so that it would look like a bib necklace.  There are 3 layers of chain with 3, 3 and 4 earrings attached to each chain.  Attach the clip-ons with some jump rings, voila !

I still have the whole bag of jewelry to work with.  Part of my New Years resolution is to use the craft making materials that I have instead of perpetually adding to it.  Do you have any crafting resolutions?

Cloud Kawaii DIY

I wanted a little friend.

Flatten a piece of polymer clay to about 1/4'. My favorite is Sculpey you can get it here: Sculpey Multi Color Pack. Cut out a basic cloud shape, I used a knife. Shape and flatten.

Set on a baking sheet and bake according to the instructions on the back of the package.  Once it was cooled I sanded the polymer clay since it was a little nodular.  The "white" polymer clay was not as white as I would have preferred as you can see above.  So I painted it, added the little face and then glazed.  I am going to add a pin back for a brooch, and maybe even a clasp so I can wear it as a necklace.

I am in looooove with this little guy.  What do you guys think super kawaii or what?

Rock Wear Necklace DIY


Here's a little DIY necklace for all you lovelies to create in a few minutes flat!

All you need is some sculpey, head pins, chain, clasp and an oven.

Quite honestly I bought some Sculpey because it was super on sale. I had all these grandiose ideas of creating a cute fox, and plenty of hand crafted roses. Well....... apparently just because you know what a fox looks like in your mind, my hand/eye/brain coordination was just not letting that happen.  After a lot of failure and frustration, I mushed up all the clay together ha.  Mix less for a marble look.

The directions say to preheat oven to 275 degree Fahrenheit and bake for 15 minutes.  Honestly I think I set it to around 325 and forgot about them for about 35 minutes.  It seems this stuff is pretty forgiving.  I would recommend the instructions just in case.

Add as many rocks per head pin as you would like, and then connect all.  Add chain and clasp and you are done !! 
I really love how this turned out. Some how the length is perfect and the necklace seriously matches 85% of my wardrobe. I am not even sad about my lack of fox and flowers! What craft blunders of yours have turned out your favorite results?

Before I go! Have you been trying to achieve financial independence? 

Proofread Anywhere might be the solution you are looking for.

Proofread Anywhere was created by the extraordinary Caitlin Pyle
Proofreaders consistently make up to $65 an hour and are able to work anywhere in the world. I’ve been following Caitlin’s money earning journey for years and she is the creator of Proofread Anywhere. Four years ago when she bought her first house with her earnings, I was enthralled with how she did it. It was all through proofreading, and she teaches us her exact ways.
This gig is obviously for a very specific type of person who LOVES to correct grammar, hates when authors use a comma splice, or makes note of spelling mistakes on a restaurant menu… it takes a certain “eagle eye” ability to be good at proofreading!
Now, how much can you make as a proofreader? Well, since I’ve been a Caitlin fan for a long time I happen to have a couple friends who are in that industry, and it turns out — quite a lot! There are some proofreaders earning over $40,000 working for themselves and loving their jobs. Completely free of office walls.
Leverage skills that you already have by starting a proofreading business! The handy webinar will quickly let you know if Proofreading is the right direction for you.
Ready to start your journey? Get free access to the Master Class Proofread Anywhere Webinar run by Caitlin by registering now. It’s a free way to see if proofreading is right for you.
My Go-To Resources
Trim – Bill Negotiator Will negotiate bills with credit card companies and potentially get them lowered. Trim will also ensure that your subscriptions are cancelled across all your accounts. This is a full money-saving system for free. Tryout the Trim Bill Negotiator today and see how much you could be saving! 8 Million dollars was saved for users last year alone.

Ebates Coupons deals and cash back. When you’re shopping online if you aren’t stacking your savings, you’re losing serious money. Get rebates from 1%-20%+ on thousands of stores and get $10.00 for signing up. I won’t shop without Ebates.


Ibotta! I save on all my staples from eggs, to paper towels, to coffee and even uber rides! With Ibotta you just snap a picture of your shopping receipt and match it with current deals available online. Get $10 just for signing up through The Rising Damsel. Redeem your first $10 by verifying a purchase from any of their stores. It’s an obsession. 


Making Sense of Affiliate Marketing to earn money blogging. There are tons of ways to make money on your blog. If you want to make money by promoting an affiliate, you need Michelle’s course Making Sense of Affiliate Marketing. It was an invaluable resource to me despite 1,000+ hours of research on how to earn. The money didn’t actually start coming in till I took this course. Save yourself from frustration, Michelle has it figured out for us!

Couch Cleaning DIY

I have to stress !!!!!!! HUGE STRESS !!!! This is not my loveseat.  Ok now that I have that out of the way..... have you ever wondered if things you find on pinterest work?  Well if this isn't the proof then stop looking at pinterest now ha!

My friend bought a couch and loveseat.  It was in the dark.  We got it in the light, and well you can see what he ended up with.  Believe me, there is noway.... NOWAY he would have bought it if it looked half as bad in the dimly lit room as it did in the light.  I headed to Target with my list and got to shopping.

Items needed:
Rubbing alcohol
squirt bottle
white scrubby sponges
towels

Seriously we probably went through 5 bottles of the largest size rubbing alcohol, 12-15 sponges and 15-20 towels.  This was on the love seat you see here, and its matching counterpart the couch.

Squirt down the area you are cleaning and scrub, scrub, scrub with the white sponge (white is important so there is no color transfer from say a green sponge).  Keep scrubbing.... keep scrubbing scrub some more and then rub, rub, rub with the towels.  The sponges will pick up dirt and loosen grime, but the towels really grab all the dirty nasty stuff.  Work in sections and repeat.  I probably scrubbed each of these cushions with the above remedy 3-4 times.  Alcohol dries fast enough that it won't leave spots.

If you look close enough the cushions aren't perfect, but goodness gracious me!  The couches were saved... barely.  The whole project cost less than $50.00 bucks, definitely a steal if you are saving or reclaiming furniture!  I definitely recommend this technique for huge projects, or spot treating... you won't be sorry (just grossed out at the color change).
Are you still in shock? because I am. eww.